This interactive is designed to help students understand the statistical approach underpinning the drawing of a best-fit line for practical work. For context, our national exams have a practical component where students will need to plot their data, often following a linear trend, on graph paper and to draw a best-fit line to determine the gradient and y-intercept.
The instructions to students on how to draw the best-fit line is often procedural without helping students understand the principles behind it. For instance, students are often told to minimise and balance the separation of plots from the best-fit line. However, if there are one or two points that are further from the rest from the best-fit line (but not quite anomalous points that need to be disregarded), students would often neglect that point in an attempt to bring the best fit line as close to the remaining points as possible. This results in a drastic increase in the variance as the differences are squared in order to calculate the "the smallest sum of squares of errors".
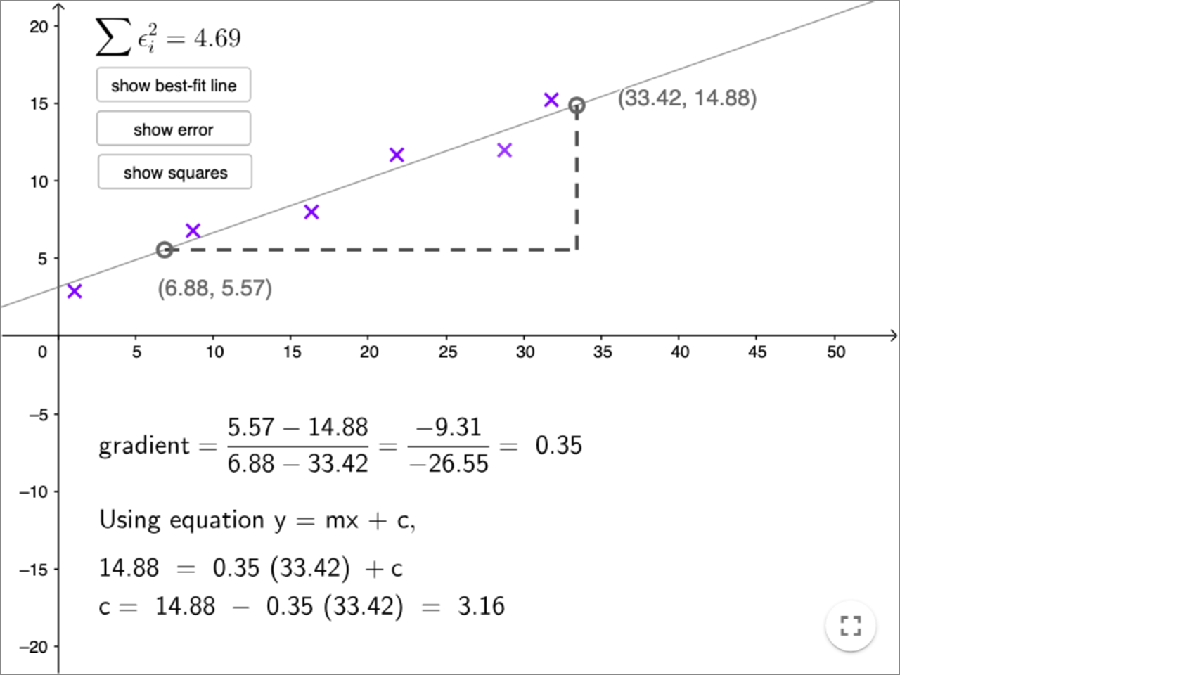
This applet allows students to visualise the changes in the squares, along with the numerical representation of the sum of squares in order to practise "drawing" the best-fit line using a pair of movable dots. A check on how well they have "drawn" the line can be through a comparison with the actual one.
Students can also rearrange the 6 data points to fit any distribution that they have seen before, or teachers can copy and modify the applet in order to provide multiple examples of distribution of points.