23 Dec 2012 - Seng Kwang Tan 07 Circular MotionDemonstrations
A indoor boomerang can be constructed using 3 strips of cardboard put together. Throwing it may require some practice though but when you get the hang of it, it can inject great...
A indoor boomerang can be constructed using 3 strips of cardboard put together. Throwing it may require some practice though but when you get the hang of it, it can inject great fun into your lesson. You can explore using different types of material to get the best boomerang.
Materials
Cardboard about 1 mm thick, of suitable rigidity
Staples
Scissors
Rubber band or tape for added weight
Procedure
[caption id="attachment_349" align="alignright" width="159"] Cardboard strip with a slit cut[/caption]
Cut 3 equal rectangular strips of cardboard measuring 12 cm x 2.5 cm. You may like to trim the sharp corners on one of the ends of each strip.
Cut a slit of 1.5 cm along the middle of each strip, on the untrimmed end.
Join the strips together at the slits, the angle between two adjacent strips being 120 degrees.
[caption id="attachment_348" align="alignright" width="314"] 3 strips of cardboard overlapping each other[/caption]
One side of the slit should overlap another so that it looks like the above:
Staple the overlapping centre together.
The boomerang is ready for use! Throwing the boomerang is done by holding onto one of the wings. The boomerang should be almost vertical, at an angle of about 10o. With a flick of the wrist, spin the boomerang as it leaves the hand. The direction of spin should be toward the side that is tilted up.
Science Explained
A boomerang requires a centripetal force to cause it to fly in a circular path back to the thrower. This centripetal force comes from the lift that the wings generate as they cut through the air.
08 Nov 2012 - Seng Kwang Tan 09 OscillationsDemonstrations
There are many ways to tune a guitar. Many musicians would have tuned a string instrument using a tuning fork at some point. However, the conventional method of tuning with a...
There are many ways to tune a guitar. Many musicians would have tuned a string instrument using a tuning fork at some point. However, the conventional method of tuning with a tuning fork is by listening to beats while adjusting the tension of the string. The tuning fork is of a known frequency which corresponds to a note. For instance, 440 Hz corresponds to an A-note. When the A-note string is slightly out of tune, such as having a frequency of 438 Hz, the resulting sound pattern (called beats) will have a frequency that is the difference between the two frequencies, i.e. 2 Hz. Hence, the aim of tuning by listening to beats is to adjust the tension of the string until the beats disappear.
An alternative method, which is the one we shall attempt in this demonstration, is to run the vibrating tuning fork along the E-string (this first from the top) until you reach the bridge between the 5th and 6th frets. You should expect to hear a loud resonating sound there. Otherwise, adjust the tension until you do.
All the other strings are tuned with respect to that first string.
Explanation
Resonance is the phenomenon where the frequency of the tuning fork (driving frequency) is equal to the frequency of the string (natural frequency) and maximum energy is transferred from the tuning fork to the string. The string will hence oscillate with the maximum amplitude.
03 Nov 2012 - Seng Kwang Tan 14 Electric FieldsDemonstrationsIP4 10 Static Electricity
A thin stream of water can be easily bent using a plastic comb or ruler which was previously rubbed with wool. This demonstrates the attractive forces between unlike charges....
A thin stream of water can be easily bent using a plastic comb or ruler which was previously rubbed with wool. This demonstrates the attractive forces between unlike charges.
Materials
Plastic ruler
Wool
Water from a tap
Procedure
Turn on the faucet for the thinnest stream of water with a consistent flow.
Rub the plastic ruler with the wool.
Place the part of the ruler which was rubbed near the stream of water without touching.
Science Explained
Water molecules are polar in nature, which means that one side (where the oxygen atoms are) is more negative while another side (where the hydrogen atom is) is more positive. When wool is rubbed with plastic, it deposits electrons on the ruler.
The electrons will remain on the plastic as it is a poor conductor of electricity. When placed near the stream of water, the water molecules reorientate themselves such that the positive pole of each molecule is now nearer to the ruler than the negative pole.
The resulting attractive forces are stronger than the repulsive forces as the forces between charges decrease when the distance apart increases.
02 Nov 2012 - Seng Kwang Tan 17 Electromagnetic ForcesDemonstrationsIP4 15 Electromagnetism
Materials Insulated wire (about 1 m in length) Iron nail (at least 5 cm in length) 1.5 V battery Adhesive tape Small metal paper clip Procedure Test that the iron nail is not...
Materials
Insulated wire (about 1 m in length)
Iron nail (at least 5 cm in length)
1.5 V battery
Adhesive tape
Small metal paper clip
Procedure
Test that the iron nail is not already magnetised by trying to pick up the metal paper clip with it.
Strip the two ends of the wire off its insulation. Leave about 1 cm bare on each end.
Coil the wire around the iron nail, pushing each coil tightly together, to make a solenoid. Make sure you leave about 5 cm free at each end of the wire in order to connect the battery to the solenoid.
If there is excess wire, make a second layer of coils around the first layer.
Connect the ends of the wire to the terminals of the battery.
Test the solenoid now by picking up the paper clip.
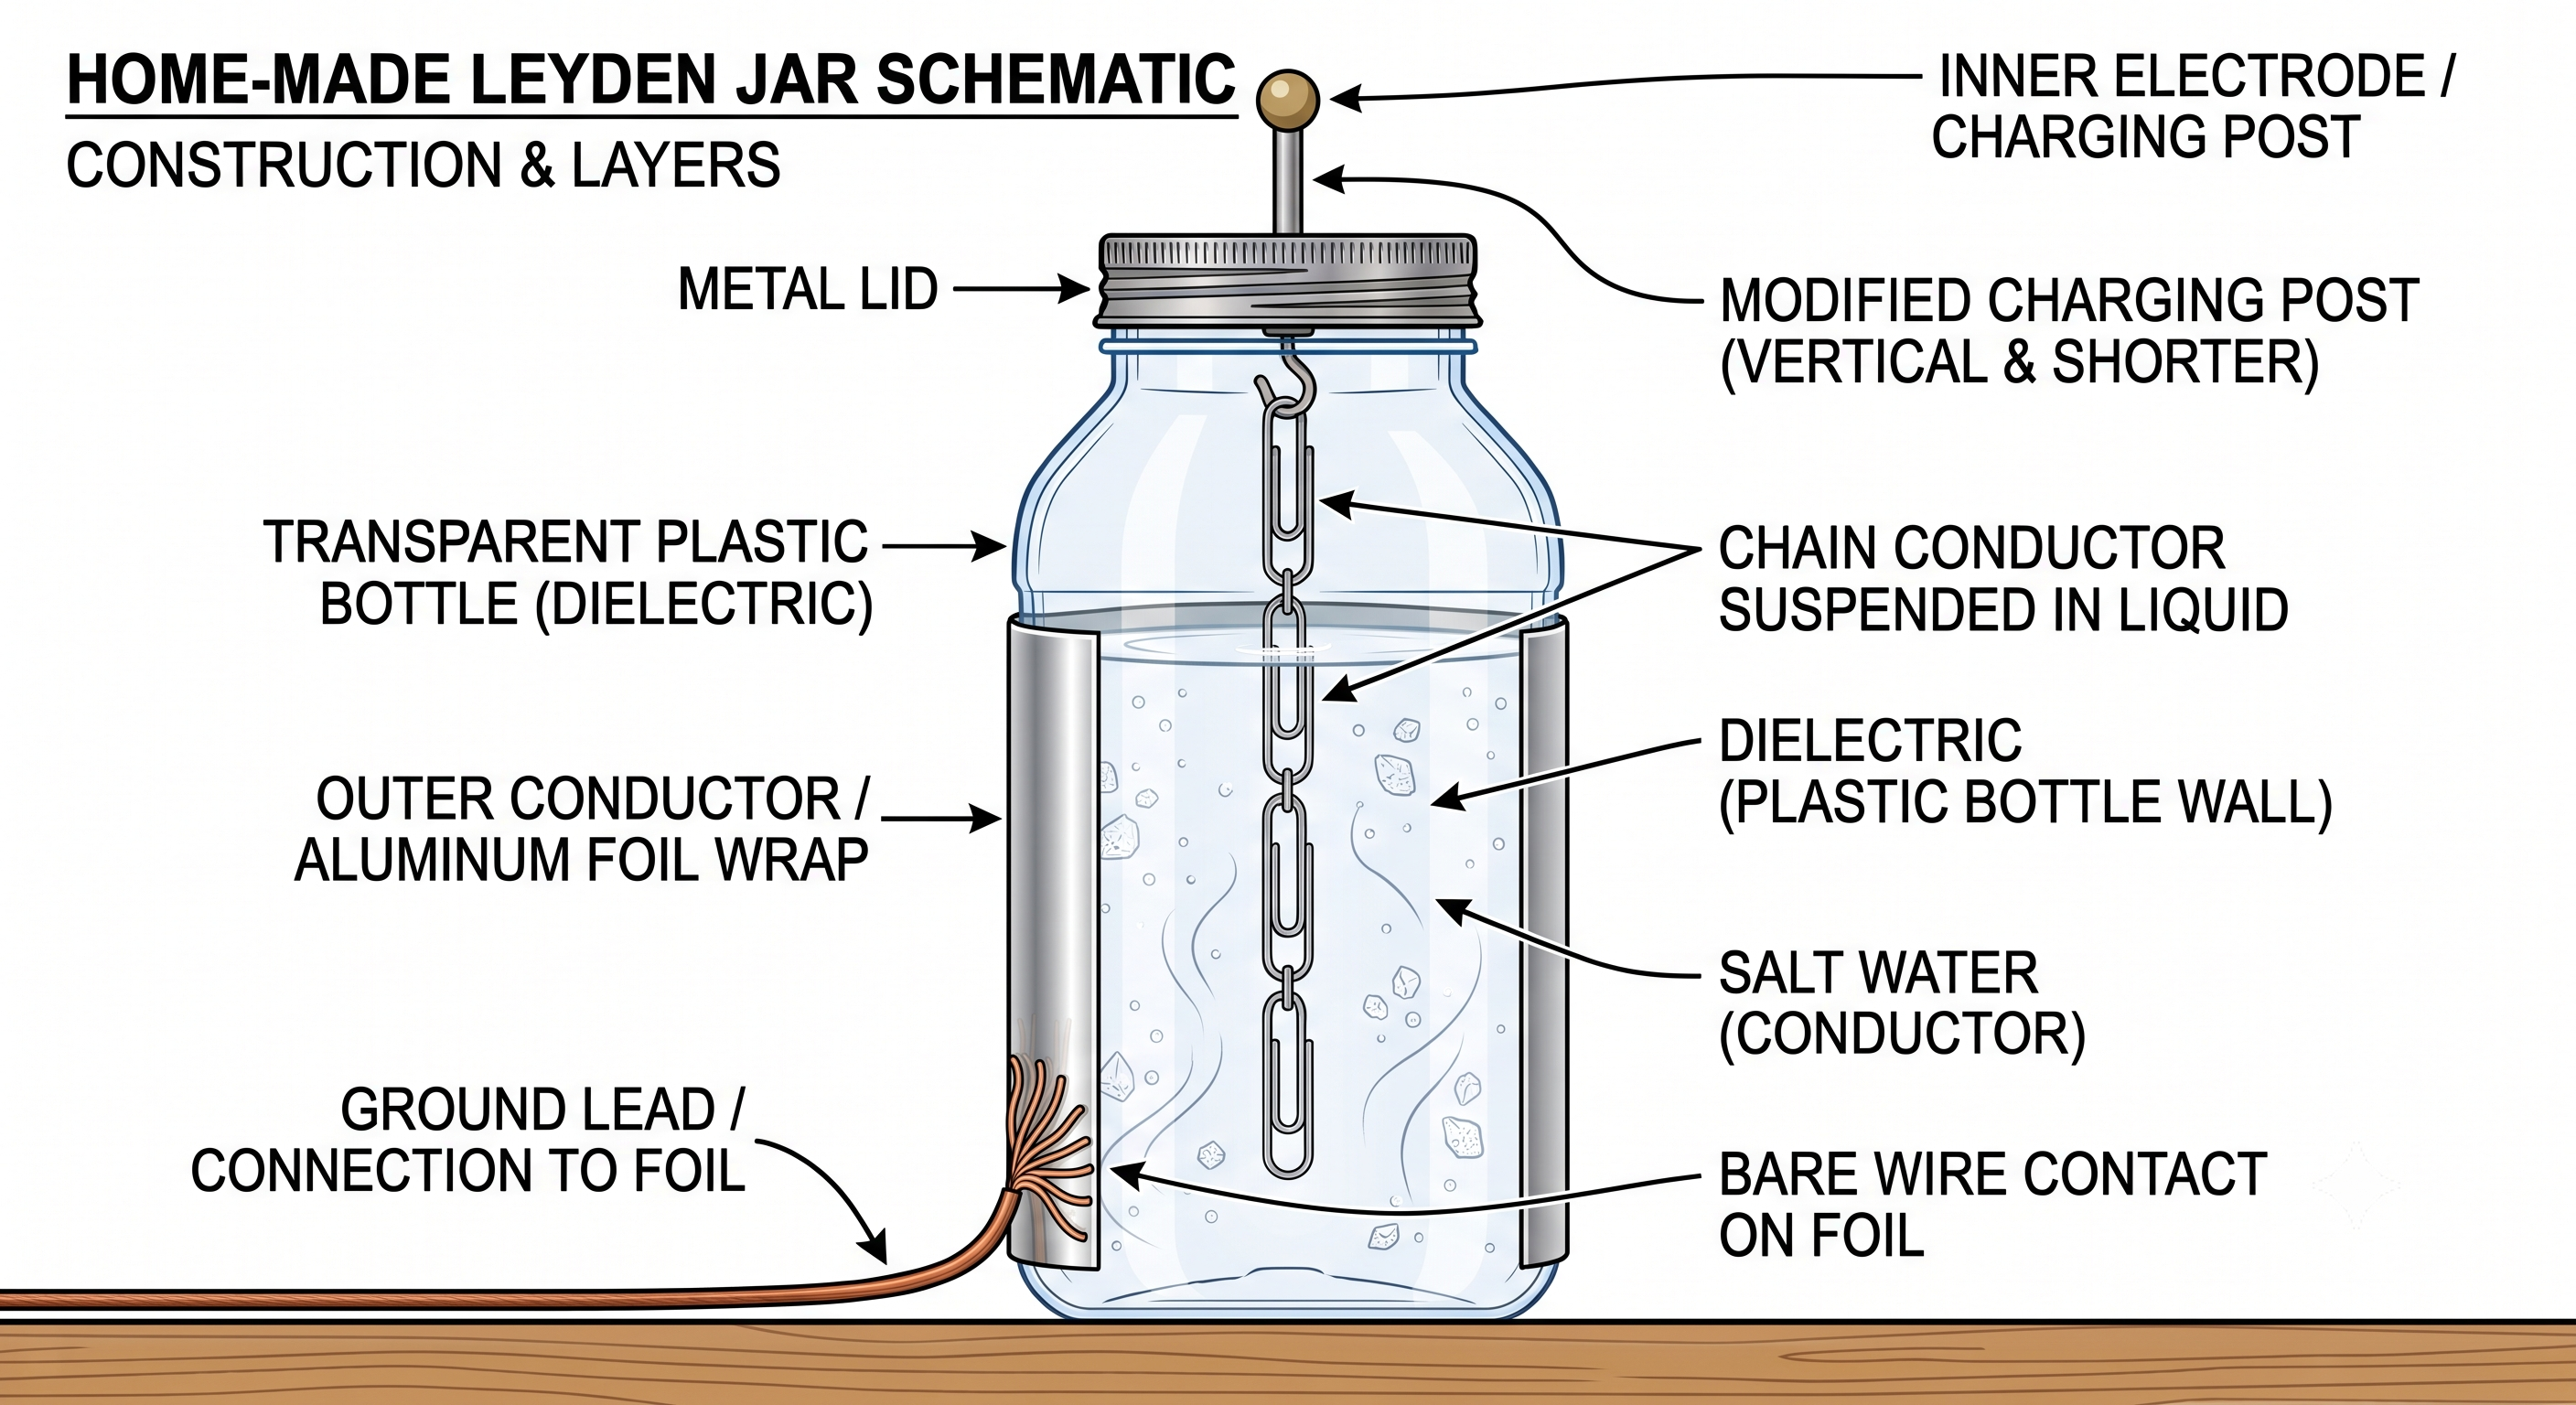
A Leyden jar is a device used to store static electric charge. It can be used to conduct many experiments with electricity such as creating a spark across a gap. Be careful...
A Leyden jar is a device used to store static electric charge. It can be used to conduct many experiments with electricity such as creating a spark across a gap.
Be careful not to be too ambitious with the amount of charge stored and do not carry out this demonstration with the charge passing through your hands if you have a weak heart! Try not to carry out this demonstration without adult supervision and make sure that you are clear of any furniture that might hurt you should the discharge cause you to crash into nearby furniture. Finally, do this demonstration at your own risk!
Materials
Plastic cylinder with lid (e.g. soap bottle, film canister)
Brass or steel sinker
Saltwater
Metal paper clips
Aluminum foil
Adhesive tape
Wire
PVC rod
Wool
Procedure
Cut a rectangular piece of aluminum foil of width equal to three-quarters of the height of the plastic cylinder, and length equal to the circumference of the cylinder.
Stick it onto the outer surface of the cylinder with adhesive tape, leaving about a centimeter of gap between foil and the base. Make sure that the aluminum foil remains smooth.
Pierce a hold in the middle of the lid of the plastic cylinder and put the hook of the sinker through it. String 3 to 4 metal paper clips together and hang them from the hook.
Fill up three-quarters of the plastic cylinder with saltwater.
Put the lid on with the paper clips dipping into the saltwater.
Stick one end of the conducting wire onto the foil and the other end to a metal tap. The purpose of this wire is to earth the foil. Alternatively, you can get someone to hold on to the Leyden jar with his hands around the foil while you charge up the jar.
Now the Leyden jar is ready for use. To charge up the Leyden jar, you can either place it near the screen of a cathode ray tube TV, or rub a PVC rod with wool, making sure that the surface of the rod that is being rubbed gets real close to the sinker. You should be able to hear a crackling sound as charges fly through the air to the Leyden jar.
Note that if your environment is humid, switching on either the air conditioner or dehumidifier will make charging up the Leyden jar easier.
To discharge the Leyden jar, you can either give yourself a mild electric shock by placing your finger on the sinker (if you can take it) or using the loose end of the conducting wire to do so. Turn off your lights and you should be able to see a spark before the conducting wire touches the sinker.
Science Explained
The Leyden jar serves as a capacitor – a device that stores charges. When charges are deposited via the sinker, the saltwater receives an electric charge which induces an opposite charge on the aluminum foil outside. The plastic keeps the charges apart. When the conducting wire touches the sinker, it provides a path for the charges to flow.
It can be charged up by rubbing a PVC tube with a piece of wool. The pipe should be placed near the door knob (made of brass). One member of the group will hold the curved surface of the jar with both hands while the next member will hold his forearm, and join hands with everyone else. The last person in the line will then touch the door knob, thereby completing the circuit loop.
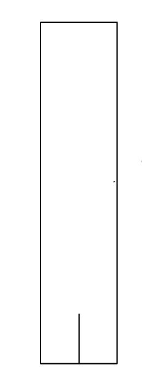 Cardboard strip with a slit cut[/caption]
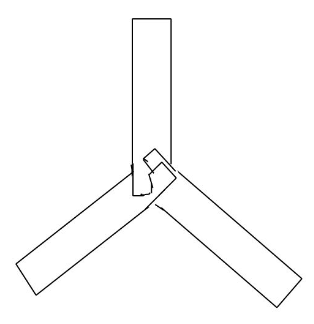 3 strips of cardboard overlapping each other[/caption]